Little did we know that what we were actually starting was a community. The Conclave is many (maybe not Legion but many) now and from time to time we have Guest Writers, from guest reviews to Dan's Tech Bay we are ALWAYS open to more people contributing. A: It widens perspective a little, and B: As I have alluded to in a previous article I just cannot do it on my own anymore (Lee is invariably too busy these days to write much.)
And Mike Row has stepped up to the plate with a splendid tutorial on rust effects with loads of tips. Mike paints his stuff at a rate that makes me cry, ('Finished 12 Walkers today guys! - Oh great Mike, I've painted a face, like half a Scouts face') and fingers crossed he has loads more ideas that he can share with us in the future. So here we go, a 'Micro' Tutorial (Mike Row/Micro?.... oh forget it!)
Take it away Mike!
This tutorial is going to demonstrate how to add a nice rust
effect on your miniatures and scenery.
There are plenty of good videos on Youtube to look at but here’s my take
on it. For this demonstration I’ll be
using the Walking Dead All Out War scenery kit, as I find non Games Workshop
kits are harder to find tutorials on, but this method will work on anything.
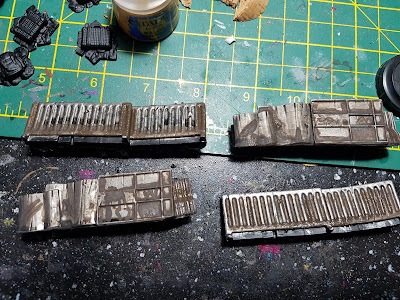
Barricades from the
scenery set basecoated with GW’s Leadbelcher
The barricade was washed liberally with GW’s Nuln Oil Gloss
wash, the gloss gives the metallic a nice shine.
It was then washed with GW’s Agrax Earthshade this gives the
barricade a dirty look.
I then applied GW’s Typhus Corrosion in areas where rust
would likely appear, in terms of the panels water would collect at the bottom
and thus that’s where rust would appear first, it would also collect in folds
and between the individual panels. Use
an old brush for the corrosion paint as it contains a fine grain and will
likely get caught in between the bristles so will damage brushes.
I then drybrushed on GW’s Ryza Rust over the corrosion
paint, the fine grains will attract the paint off the brush and will not really
stick onto the metallic paint unless you use a lot of pressure. The picture below shows my tissue paper I
used to wipe the excess paint off the brush, you want to be aiming for the
marked area of the paper. It’s better to
start slowly and build the colour up over a period of time, rather than
sloshing on too much and making it look too orange.
I added a further wash of Athonian Camoshade to further add
a grimy look to barricade.
The car on the right has just the corrosion paint whereas
the car on the left has the added Ryza Rust.
Both trucks have only Typhus Corrosion applied here.
The truck on the right has the added Ryza Rust, it is quite
heavy on the area of impact but then less as it goes up the bonnet, also I dry
brushed some Leadbelcher on other areas of the bonnet near the rust to show
some areas where rust has yet to corrode the metal.
Nice one! Cheers Mike, some ideas there I would definitely not have thought of. Can't wait to see what you come up with next!


No comments:
Post a Comment